First of all, I’m not good in flat lay and photography. My husband always said things like this, “bolehlah, haa okay bolehlah” every time I took his photo. Haha.
But, my passion in flat lay and photography will never ends. I totally love it even though I know I’m not good at it. At least, I’m trying and never stop trying. Lantaklah orang nak cakap tak cantik, yang penting di mata aku, dah cukup cantik. Sebenarnya takde lah cantik sangat tapi bolehlah kan. Boleh lagi. HAHA. #sedapkanhati
As requested from one of my dear blogger friend, Lea, I have come up with this entry. She asked about how I edit my photos, so here I am..
Telling you my secret of editing…. 😜
Before that, sorry Lea, for letting you wait for a long time. I have been thinking to post a video along with this entry but I don’t know how until recently, IOS 11 updated and screen recording is there! Problem solved! Yeayyy!!
So, here we go, AGAIN..
Secret behind my editing..
Reveals…
APPLICATION USED:
1) SNAPSEED
2) VSCOCAM
1) SNAPSEED
Snapseed is a savior for lighting problems. Aku tinggal di dalam rumah yang tiada natural lighting yang bagus. Tak kira lah waktu pagi, tengahari, dan petang. Walaupun rumah aku mengadap cahaya matahari di pagi hari, masih tiada tempat untuk aku ambil gambar..
Melainkan aku letak meja dan ambil gambar di balkoni yang sekangkang kera itu 😅 Dan pastinya aku tidak berbuat begitu. Malas nak angkut meja dan barang ke balkoni. Suami aku geleng kepala nanti. Hihi.
So, Snapseed really helps me with lighting. I know natural lighting is the best tips in order to take good flat lay photos (I have googled it for hundred times). Don’t mention again to me please ^_^
Aku guna Snapseed hanya untuk edit brightness. Tak tahu buat benda lain dengan Snapseed nanye. Hihi.
Sila baca caption for tutorial ye 😉
 |
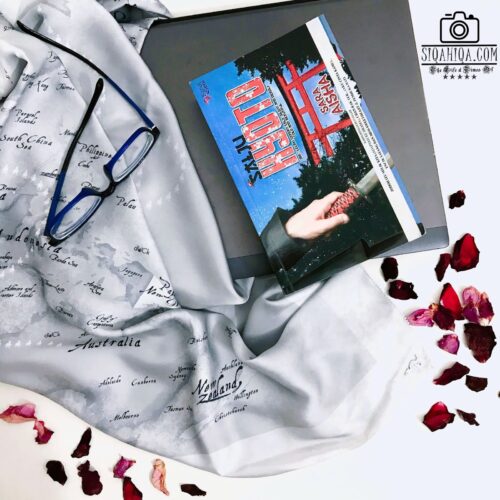
| Choose your photo. As you can see my original photo is dark and dull. |
 |
| Go to Tools and choose Selective |
 |
| Add Brightness and place it anywhere on the picture. You can add Brightness until it can’t be add anymore but don’t worry, you can still choose Tools and Selective sebanyak mana yang korang nak (Lebih faham bila tengok video di hujung entri) |
 |
| Add sebanyak mana Brightness. Edit sesedap mata memandang. If you think it’s too bright, kurangkan sikit volume brightness. Make sure your subject is not covered by extreme brightness. |
 |
| Done ^_^ |
 |
| Klik Export and Save a copy. Always remember to ‘save a copy’ instead of save. Mana tahu nanti korang tak puas hati dengan gambar yang telah di-edit dan nak edit lagi, you only can use your original photo so don’t modify your original photo. |
2) VSCOCAM
Vscocam ini adalah aplikasi yang kalau korang tak nak guna pun takpe. Snapseed alone is enough.
Aku guna Vscocam supaya gambar aku akan kelihatan lebih sekata. Walaupun tak banyak sangat beza antara gambar sebelum dan selepas edit guna Vscocam. Hihi.
Usually, I used filter HB2 for my photos. Banyak filter cantik. Korang boleh guna mana-mana filter yang korang suka. Ikut sedap mata memandang. Terpulang 🙂
 |
| HB2. My favourite filters would be HB2, HB1, S2, S3, A2 and A8. |
 |
| Snapseed |
 |
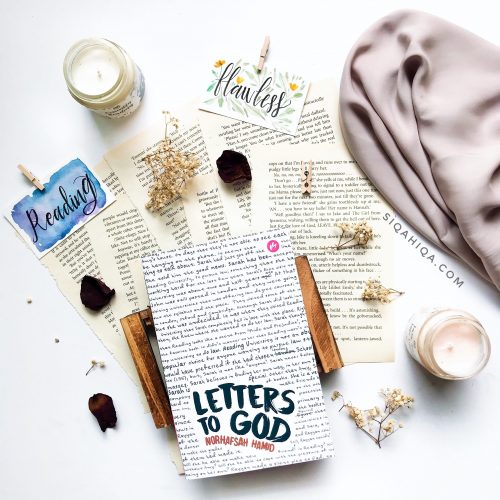
| Vscocam. HB2 |
Can you see the difference for the two pictures above? 😀
Di bawah ini, aku sertakan beberapa gambar yang aku edit menggunakan cara yang sama 😉


Nampak lebih menarik selepas di-edit kan? ^_^ As you can see, all pictures become bright after using Snapseed. Really a savior for me 🙂
Senang untuk aku nyatakan di sini bahawa lain orang lain cara untuk edit gambar. Ada orang yang lebih sukakan warna yang sebenar dan tidak terlalu terang, ada yang tak suka guna filter, ada yang tak kisah hentam saja edit macam mana pun asalkan cantik di matanya (akulah orang tu 🙋🏼😁).
Lain orang lain pendapat mengenai kecantikan sesuatu gambar. Beautiful is subjective right? Beauty means different things to different people. Mata kita nampak cantik tapi mungkin di mata orang lain nampak biasa saja.
Itulah perbezaan dalam editing dan ini bukan apply dalam editing saja. Dalam aspek lain kehidupan juga diambil kira. Semuanya terletak pada pilihan kita.
Apa yang kita perlu buat hanya hormat cara orang lain. Mana yang baik dan suka dijadikan pengajaran dan mana yang tidak suka, biarkan berlalu begitu saja. Settle. Tak payah nak hentam jadi keyboard warrior 😉
In conclusion, this is one of my way in editing pictures with white background. Only two application used, Snapseed and Vscocam.
I have found other way to edit my photos using different application but I’m still in the test phase. So, I will let you know if I love that application.
I ended this entry with a video tutorial of HOW I EDIT MY FLAT LAY PHOTOS. Feel free to watch ^_^
Thank you for reading and watching 🙂